Wireless Networks
GCC has two wireless networks available: Eduroam and Maricopa_Guest.
If you have an MEID and password we recommend that you connect to Eduroam. If you are a guest on campus you should connect to the Maricopa_Guest network.
The Guest network is not intended for use by Students, Faculty or Staff. It is a limited use network and subject to heavy traffic shaping and should be avoided.
Connecting to Eduroam is easy:
- Connect: Use the Wi-Fi settings on your device to connect to the network. Please refer to the user manual of your device if you are unsure how to do that.
- To connect to Eduroam, you will be prompted for a username and password. While the password is the same as your MEID password. Detailed instructions for connecting are below.
- If you have already connected to Eduroam previously and you are failing to connect now, you may have to 'forget network' on your device and connect again. If you continue to have issues, please open a service ticket.
- Open your quick settings menu, which is located in the bottom right corner

- Click on the arrow next to the WiFi icon
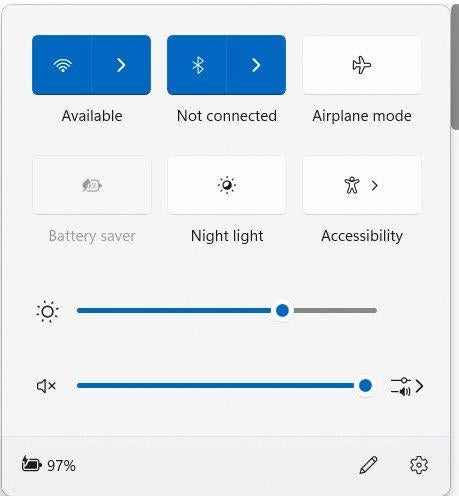
- Click on Eduroam, and connect
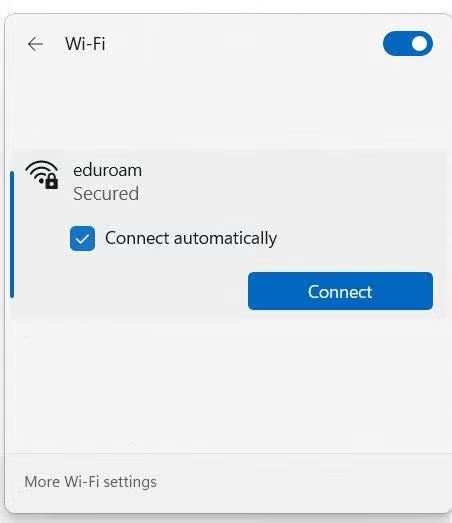
- You may see a security warning, click connect

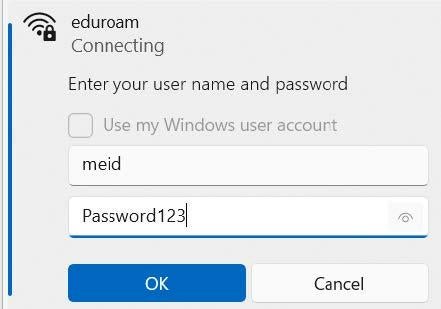
- Enter your MEID and password and click ok
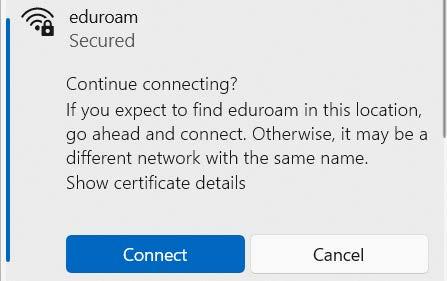
- You may see another security warning, click connect.
Images were created using Android 15 on a Google Pixel phone. Other vendors of Android may differ in the exact instructions.
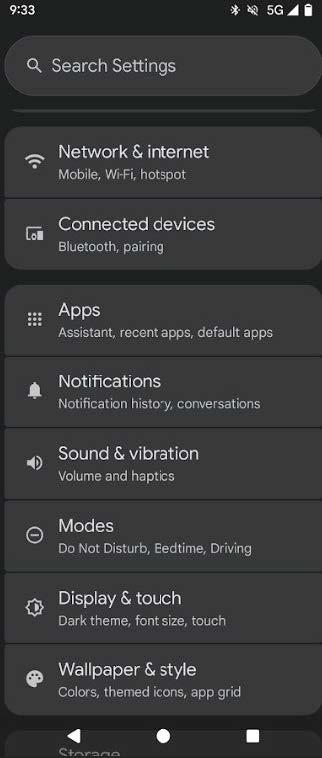
- Go into your Settings app.
- Press on "Network & Internet".
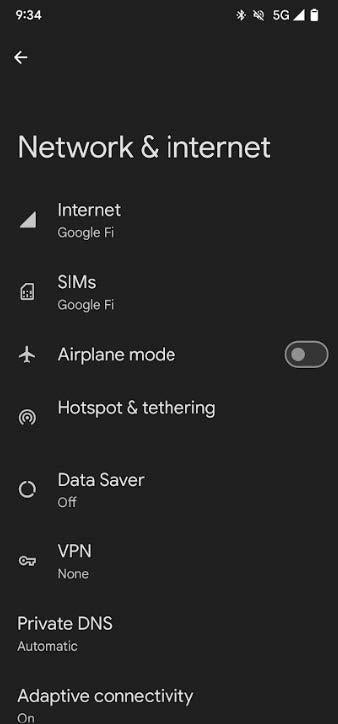
- Press on "Internet".
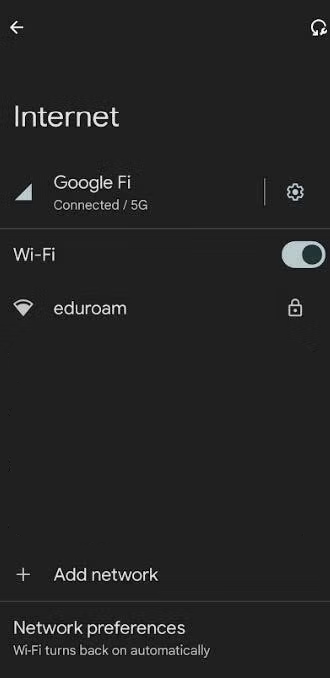
- Make sure your Wi-Fi is enabled, and press "eduroam".
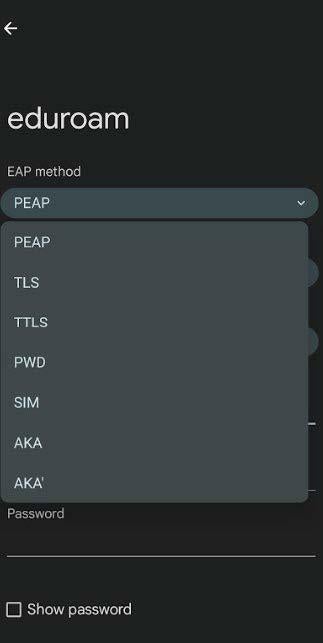
- Set the EAP method to "PEAP".
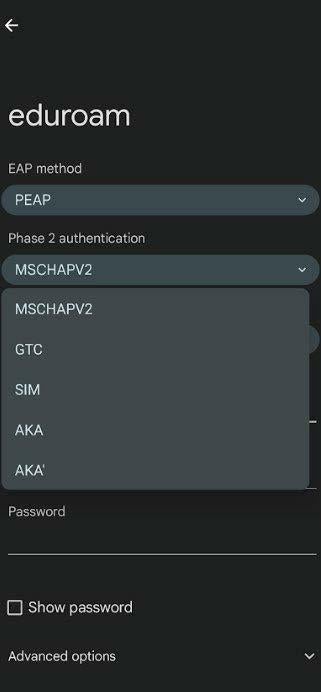
- Set the Phase 2 authentication to "MSCHAPV2"
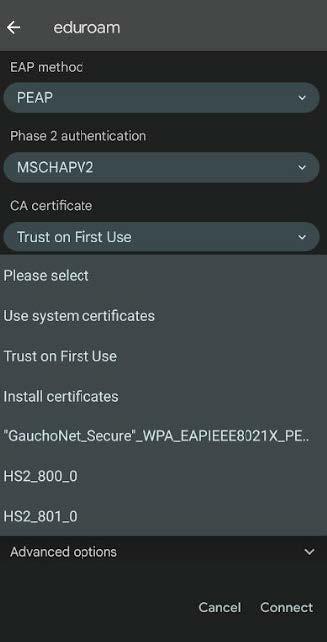
- Set the CA certificate to "Trust on First Use".
- Identity:Use your MEID
Anonymous identity: Leave blank
Password: Enter your MEID password
Then hit the Connect button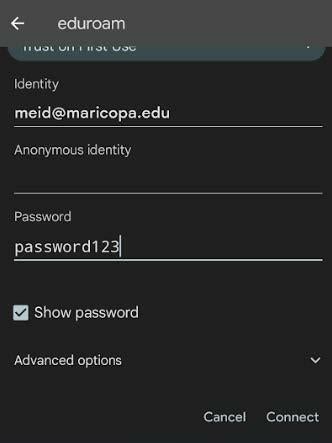
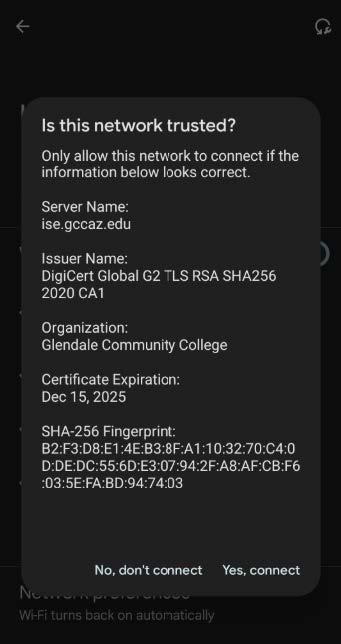
- A security warning may pop up, press "Yes, connect".
Images were created using iOS 18.5. It may look a little different on an iPad, but the steps are the same.
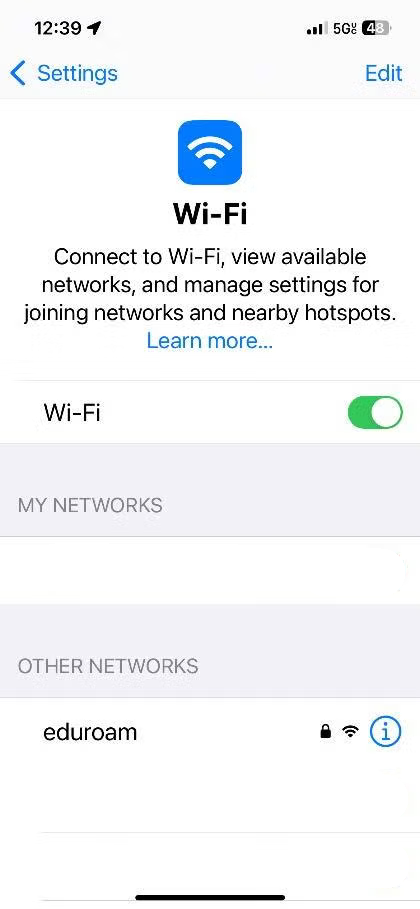
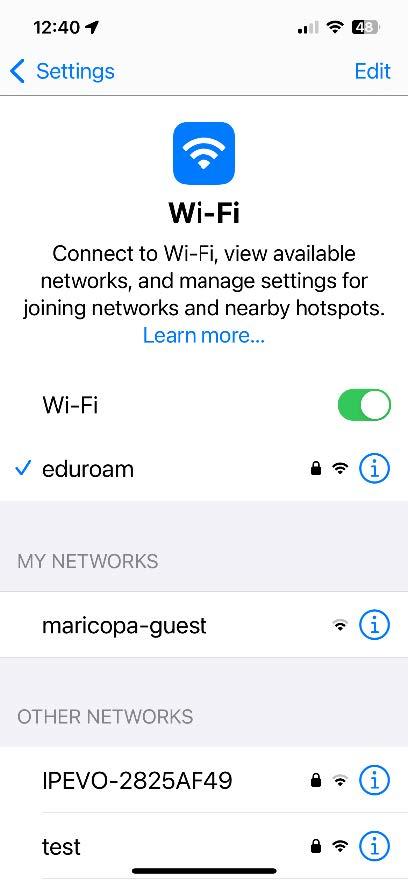
- Go into your settings app.
- Press on "Wi-Fi".

- Make sure Wi-Fi is enabled, then press on "eduroam".
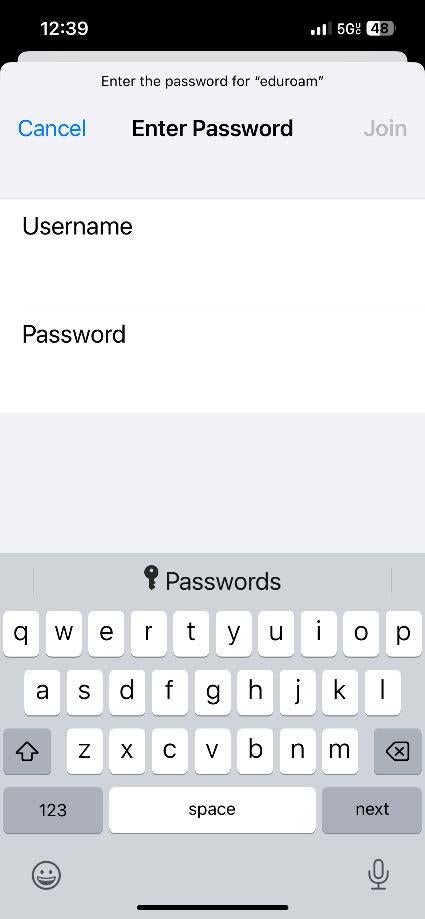
- Type in your MEID and password, then press "Join".
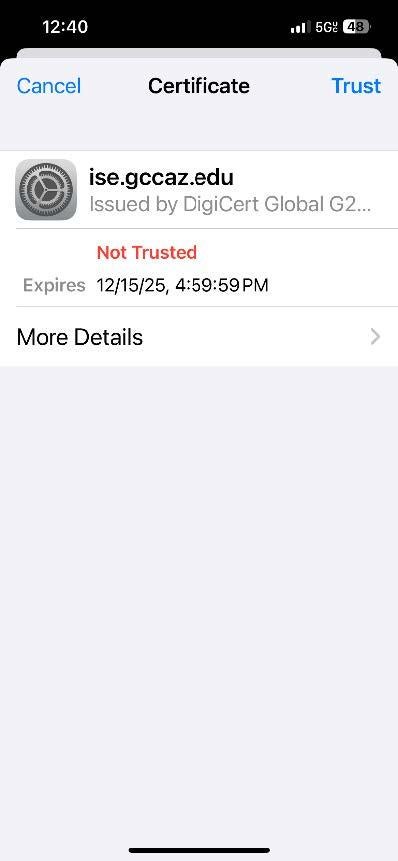
- Press on "Trust" to enable your device to join the network. This will only need to be done on the first time you join the network.
- There should be a check mark next to "eduroam" once your device has successfully joined the network.
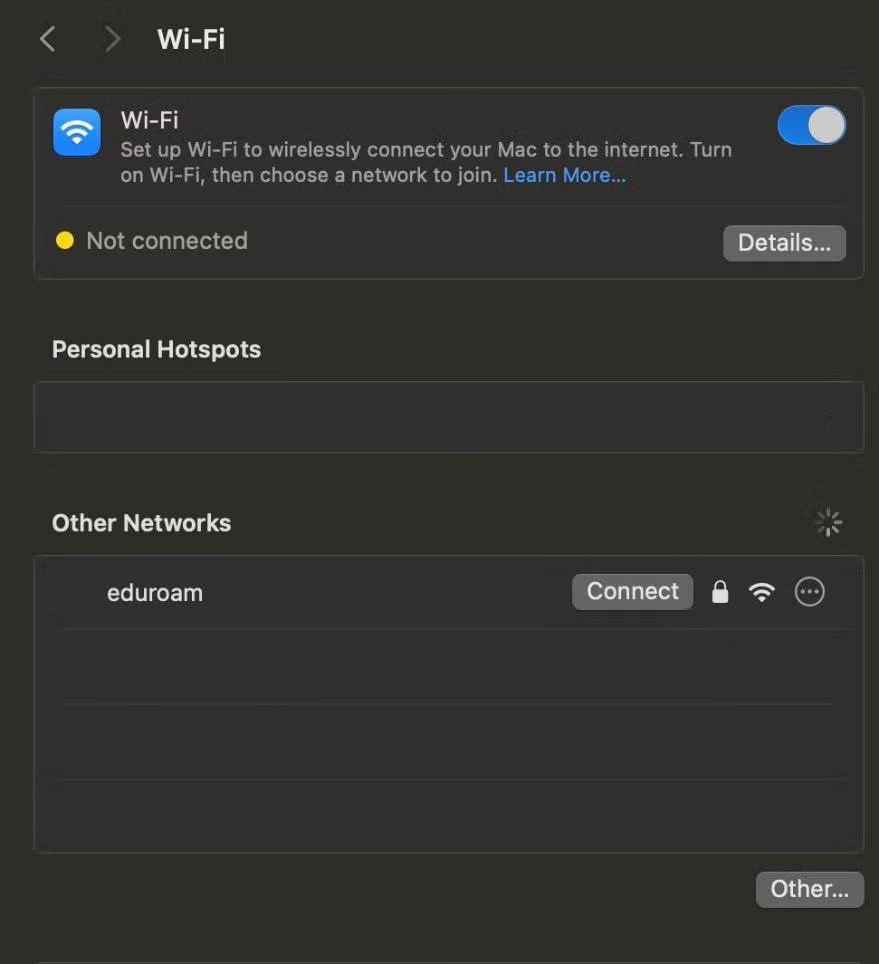
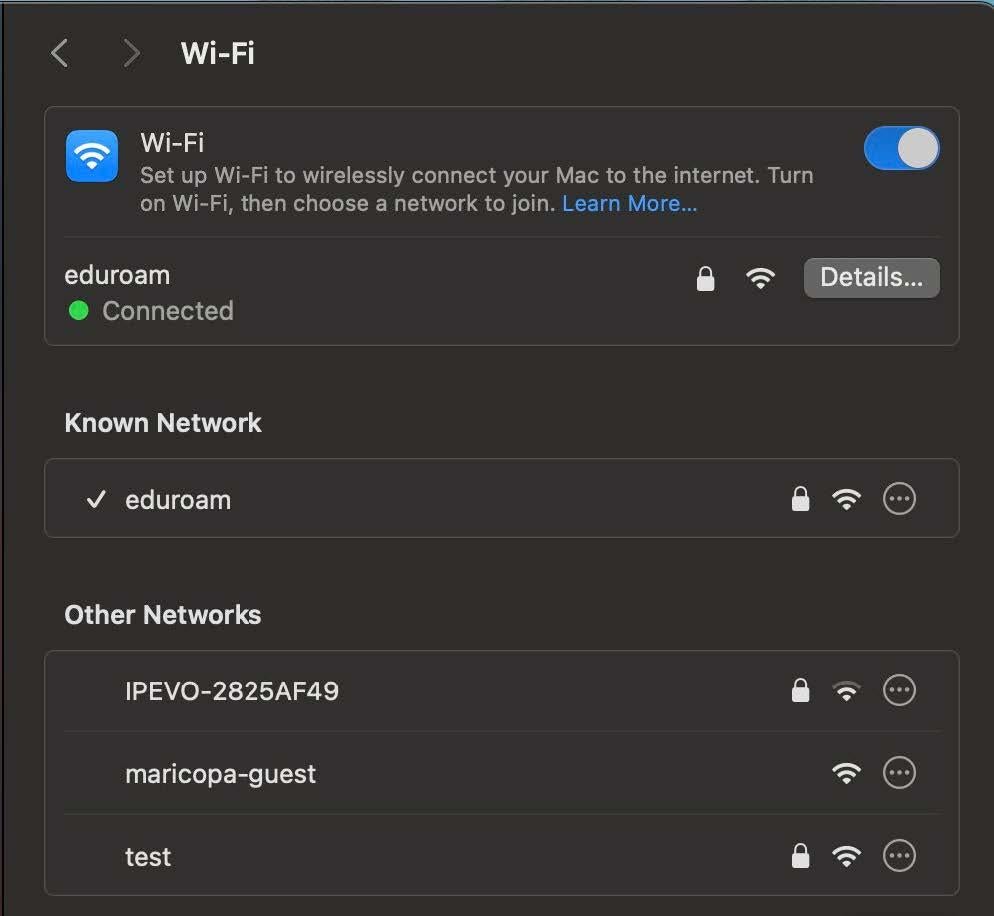
Screen shots are from a MacBook Pro running macOS Sequoia, version 15.5
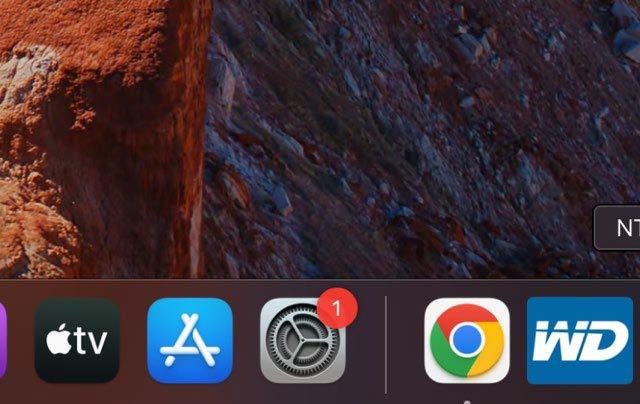
- Open your settings.
- Click on "Wi-Fi" in the left window pane. Make sure "Wi-Fi" is turned on.
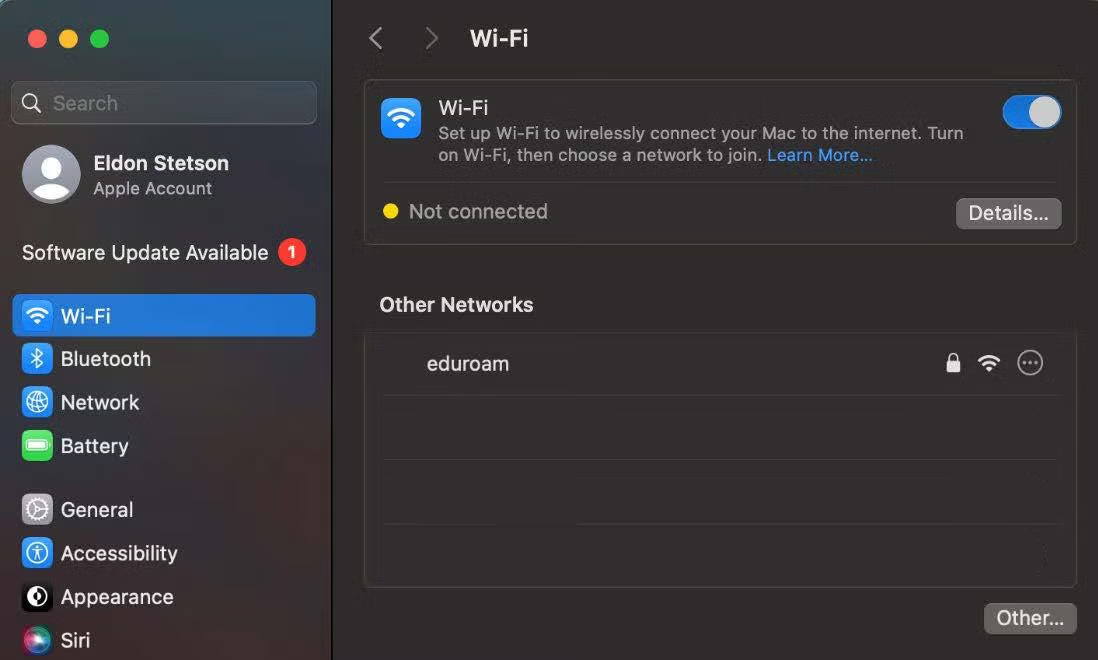
- Move your cursor over "eduroam". A "connect" button will appear. Click on the "connect" button to start the connection process.
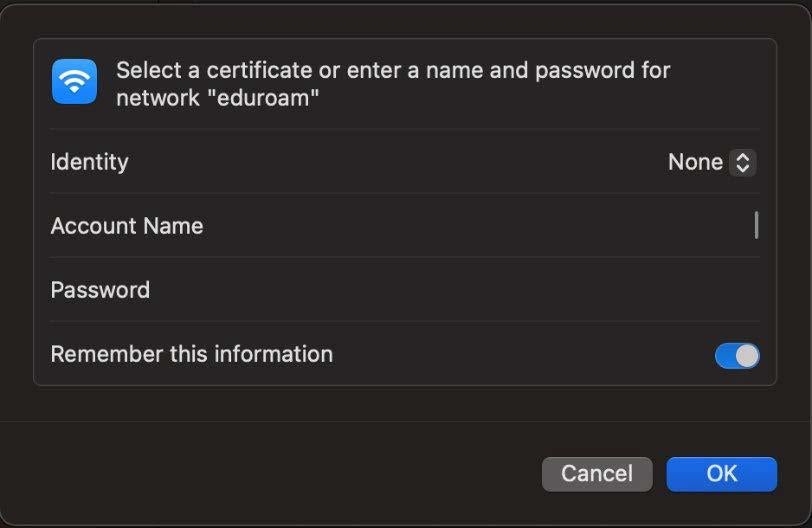
- A dialog box will pop up. Enter your MEID in the "Account Name" field, then enter your password, then click on "OK".
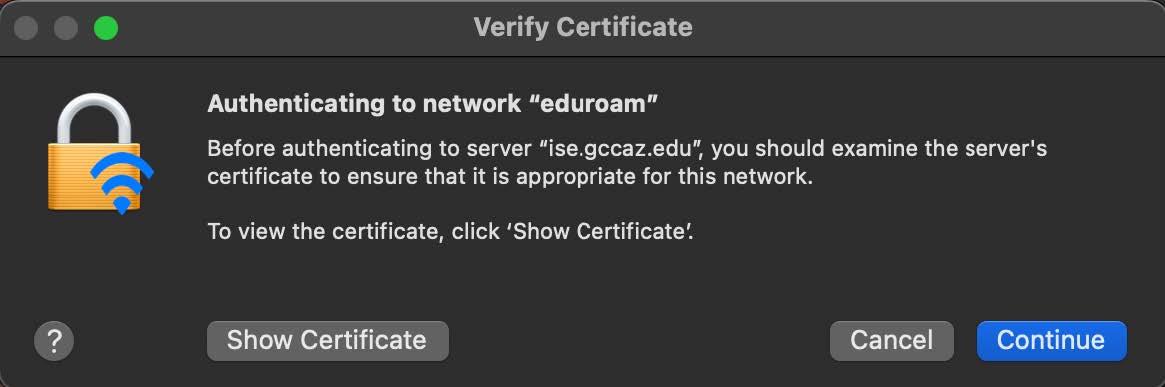
- A warning banner will pop up, asking you to verify a certificate. Just click on "Continue".
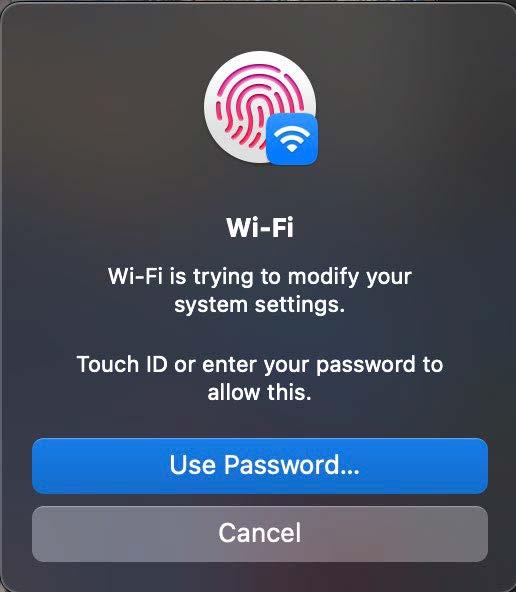
- You may see another security warning, notifying you that "Wi-Fi" is trying make setting changes. Depending on how you have security set up on your Mac, choose your preferred option, and follow the prompts for that option.
- Upon completing the connection process, your screen should look like this…
How to connect to the Maricopa_Guest network:
- Use the Wi-Fi settings on your device to connect to the appropriate network. Please refer to the user manual of your device if you are unsure how to do that.
- In case your device doesn't automatically ask you to sign in to the wireless network, start your favorite web browser in order to bring up the splash screen.
- To connect to "Maricopa_Guest", you need to read and accept the MCCCD Computing Resource Standards as prompted. If you agree, click the "Continue to the Internet" button.
Frequently Asked Questions (FAQs)
Use the instructions above to connect to the Maricopa-Guest network.
Your MEID is the same login you use to access your student/employee email, my.maricopa.edu, or to log in to one of the computers on campus. Check out the Your MEID page for complete information.
To improve network services and remain consistent with our sister colleges, we have retired GauchoNet_Secure. A secured network is still available, please use Eduroam instead.
The Guest network requires you to accept the Computing Resource Standards every 2 hours.
The secured network requires you to reauthenticate when your account password is changed.
We are not blocking any websites at this time. However, we reserve the right to limit Internet speeds if we detect disruptive activity (such as P2P file sharing).
Our network is designed to provide wireless coverage throughout most of our facilities on the GCC Main and GCC North campuses.
Please contact the GCC Service Desk to report this issue. We will do our best to help you troubleshoot your connectivity issues.
The speed of the wireless network is dependent on a few factors, such as distance to the nearest access point, and the number of users near you. In most cases, you can resolve most issues by restarting your device.
Yes. Please view the How to Print Wirelessly (pdf) for instructions on how to print from the wireless network.
Currently we support the 802.11g/n wireless standard across campus. Some high-traffic locations support 802.11ac.
GCC requires users to comply with the Maricopa Computing Resource Standards.
GCC provides very limited technical support for computers, laptops, smartphones, tablets, or any other internet-capable devices not owned by the college. This support is primarily limited to enterprise applications and network connectivity support.
Please contact the GCC Service Desk for any additional support.